Tuesday, January 7, 2014

7 ingredient, super simple Chocolate-Marshmallow cupcakes (And homemade pizza)!

First of all, HAPPY NEW YEAR!  I hope your holidays were great!  Now, to business. :)  Today I made Chocolate-Marshmallow cupcakes, and homemade pizza!  Let's start with the cupcakes...  My friend sent me this recipe to make, and when I looked at the ingredients to start making a grocery list, I realized that I had all the ingredients, and they are all items that people typically have on hand!  It was the icing on the cupcake (pun intended!) :)  These cupcakes are absolutely DELICIOUS, and really easy to make!  Definitely going to become a go-to dessert!  I'm planning on trying variations; Nutella, caramels, Rolos, etc **.  We'll see how it goes!   I think mini marshmallows would work better than the regular sized ones, because I had to cut my marshmallows in smaller pieces to fit.  But these cupcakes are amazing, trust me!

**Update on different insides:  I made another batch a few days later, this time half with Nutella, and half with a caramel inside and sea salt on top.  It was amazing!  But for the caramels, make sure to either eat them all warm out of the oven, or pop it in the microwave.  The caramel hardens as the cupcake cools.  I must say, I liked the variations better than the original!

Melt the chocolate and butter (it's okay if it looks a little weird, don't worry!)

Finished!  The recipe made six, but they got eaten before I remembered to take the picture!


Ingredients

  • 1 1/3 cups semisweet chocolate chips (I used milk chocolate)
  • 1/4 cup (1/8 lb.) butter
  • 1/3 cup granulated sugar (since my chocolate was sweeter, I did a skimpy 1/3 cup)
  • 2 large eggs
  • 1/2 teaspoon vanilla
  • 1 cup all-purpose flour
  • mini marshmallows

Preparation

  1.  In a small saucepan over very low heat, stir chocolate chips and butter until melted and smooth. Pour into a bowl and whisk in granulated sugar, eggs, and vanilla until well blended. Stir in flour.
  2.  Spray ramekins with nonstick cooking spray (or butter and flour them).  Fill six ramekins (1/2-cup capacity*) about halfway. Press a couple marshmallows into the center of the batter in each ramekin. Spoon remaining batter equally over marshmallows, completely covering.
  3.  Bake in the center of a 350° regular or 325° convection oven until tops are puffed up and crackly, 13 to 17 minutes. Let cool about 10 minutes, then run a knife along inside of ramekins and invert to release cakes. Place right side up on plates.
* If you don't have ramekins, you can use muffin pans (about 1/2-cup capacity, but mine were about 1/3 cup capacity, so I just poured less in, and it turned out fine!!).

These were supposed to be Molten, but my marshmallow dissolved.  I could still taste it a little, and it gave it a great, moist texture!  Either way, I LOVED these!  Hope you do too!


 Next was the pizza!  I decided to make my own pizza dough, using our bread machine!  It did take a while, but it was delicious!  Since I love my meat, I made a BBQ chicken and bacon pizza!


Before the oven...
Perfection!!
Homemade Pizza Dough, Bread Machine (I got the recipe from Allrecipes)

Ingredients

  • 1 Tbsp oil
  • 1 tsp lemon juice
  • 1/2 tsp salt
  • 1 Tbsp white sugar
  • 1 Tbsp dry milk powder
  • 2 1/4 cups bread flour
  • 1 tsp dry active yeast

Directions

  1. Place ingredients in the pan of the bread machine in the order recommended by the manufacturer. Select Dough cycle; press Start.
  2. Remove dough from pan after rise cycle and use for your favorite pizza recipe.

 My dough took about 2 1/2 hours in the bread machine, but the machines differ.  The recipe made 1 big pizza, and it had a thick crust!  My pizza took about 10-15 minutes to cook, at 400* F.

Hope you are having a great year so far!  Keep cooking!


Friday, December 6, 2013

Quicker Deconstructed Lasagna

Sometimes, I just crave a hot pasta dish.  Last night, I had all the fixings to make lasagna, just not the time to cook the pasta, assemble the pan, and bake it all.  So instead, I came up with a quicker version that has all the flavors of typical lasagna!!  I made this with leftover pasta, but if you are using new pasta, just omit the stock.  The cheese mixture is actually ravioli filling!  This recipe is very loose, and I made it by just adding things until it looked good!! :)  The recipe can be made for a family meal, or just for one!


Ingredients:
  • Cooked pasta  (I used fettuccine)
  • Pasta sauce
  • Ricotta
  • Mozzarella
  • Parmesan, grated  (I just used the pre-grated stuff)
  • salt and pepper
  • Butter
  • Olive oil 
  • Chicken or Vegetable stock

Directions:

Cheese mixture:  In a medium bowl, mix equal parts ricotta and mozzarella.  Sprinkle in parmesan.  Season with salt and pepper to taste.  Taste the mixture and fix to your liking.

In a medium (or small, depending how much pasta you have) saucepan, melt the butter and olive oil together.  Add the pasta and a splash of stock.  Stir.  Pour in however much sauce you want and stir some more.  Add the cheese mixture in dollops.  Stir occasionally until the cheese is melted and everything is warm.  Salt and pepper to taste.  Enjoy!! 


Thursday, November 28, 2013

Happy Thanksgiving!

Happy Thanksgiving!  
Today I am thankful for:

My Friends and Family,
A roof above my head,
Food in my belly (or soon to be at Thanksgiving dinner!),
and lots more!!!

Have a good feast!
 

Sunday, November 17, 2013

Chicken Pot Pie

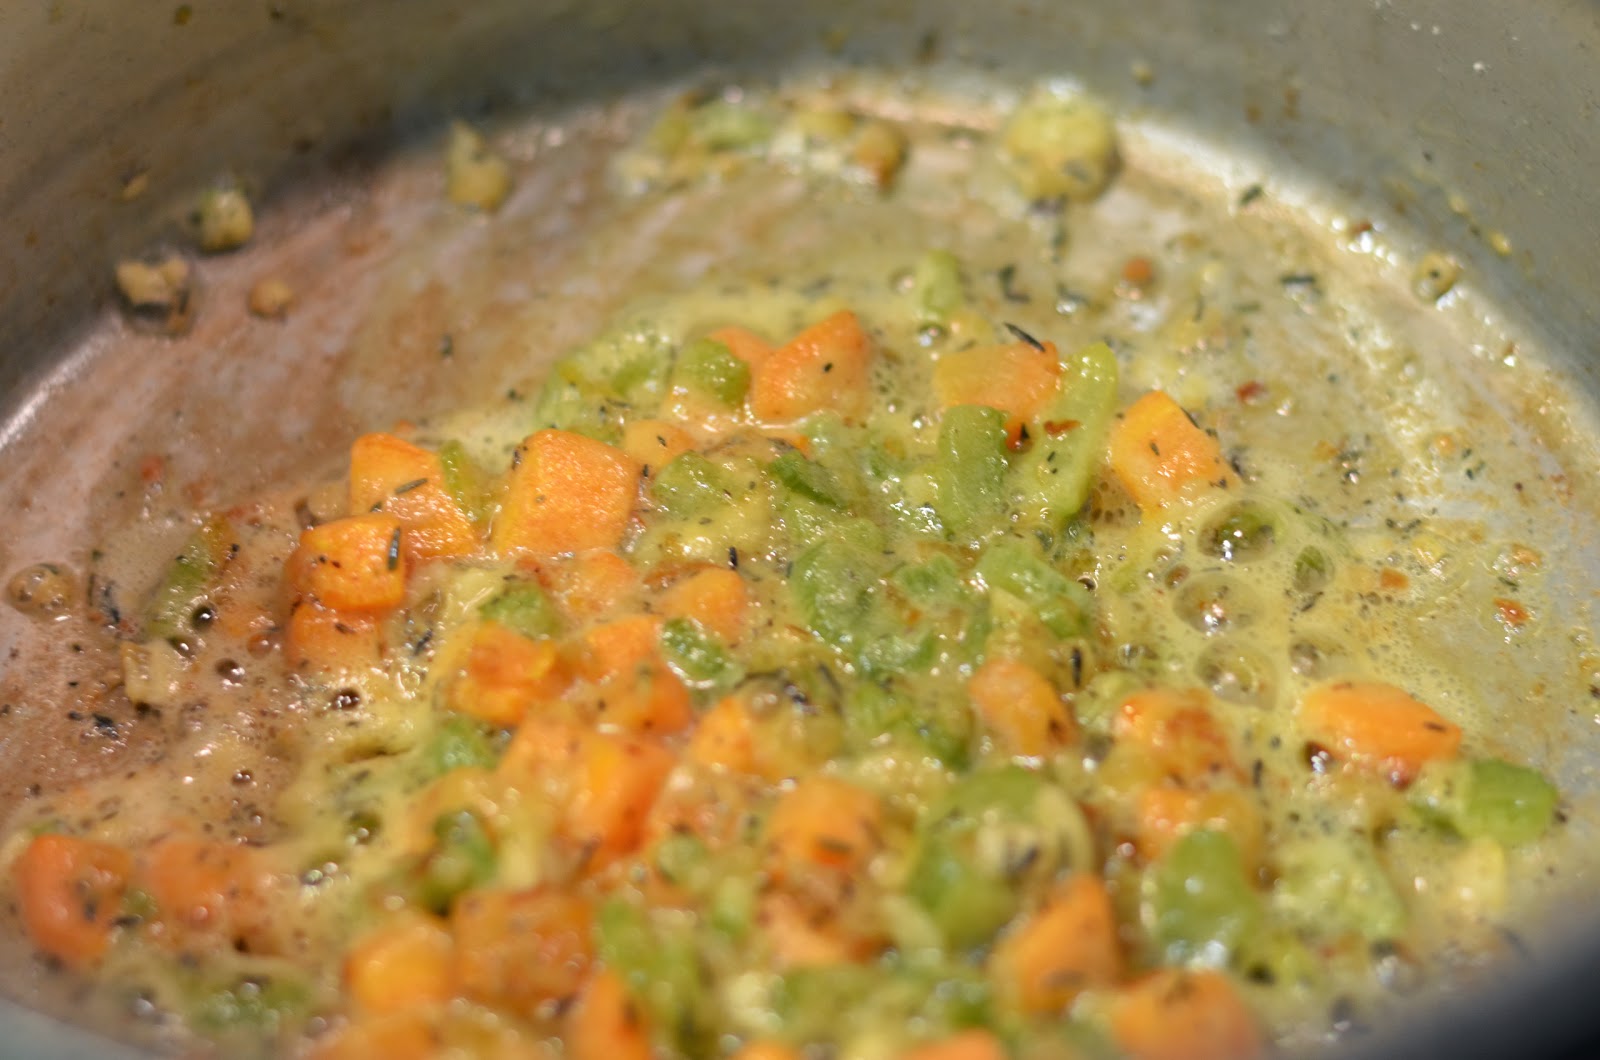
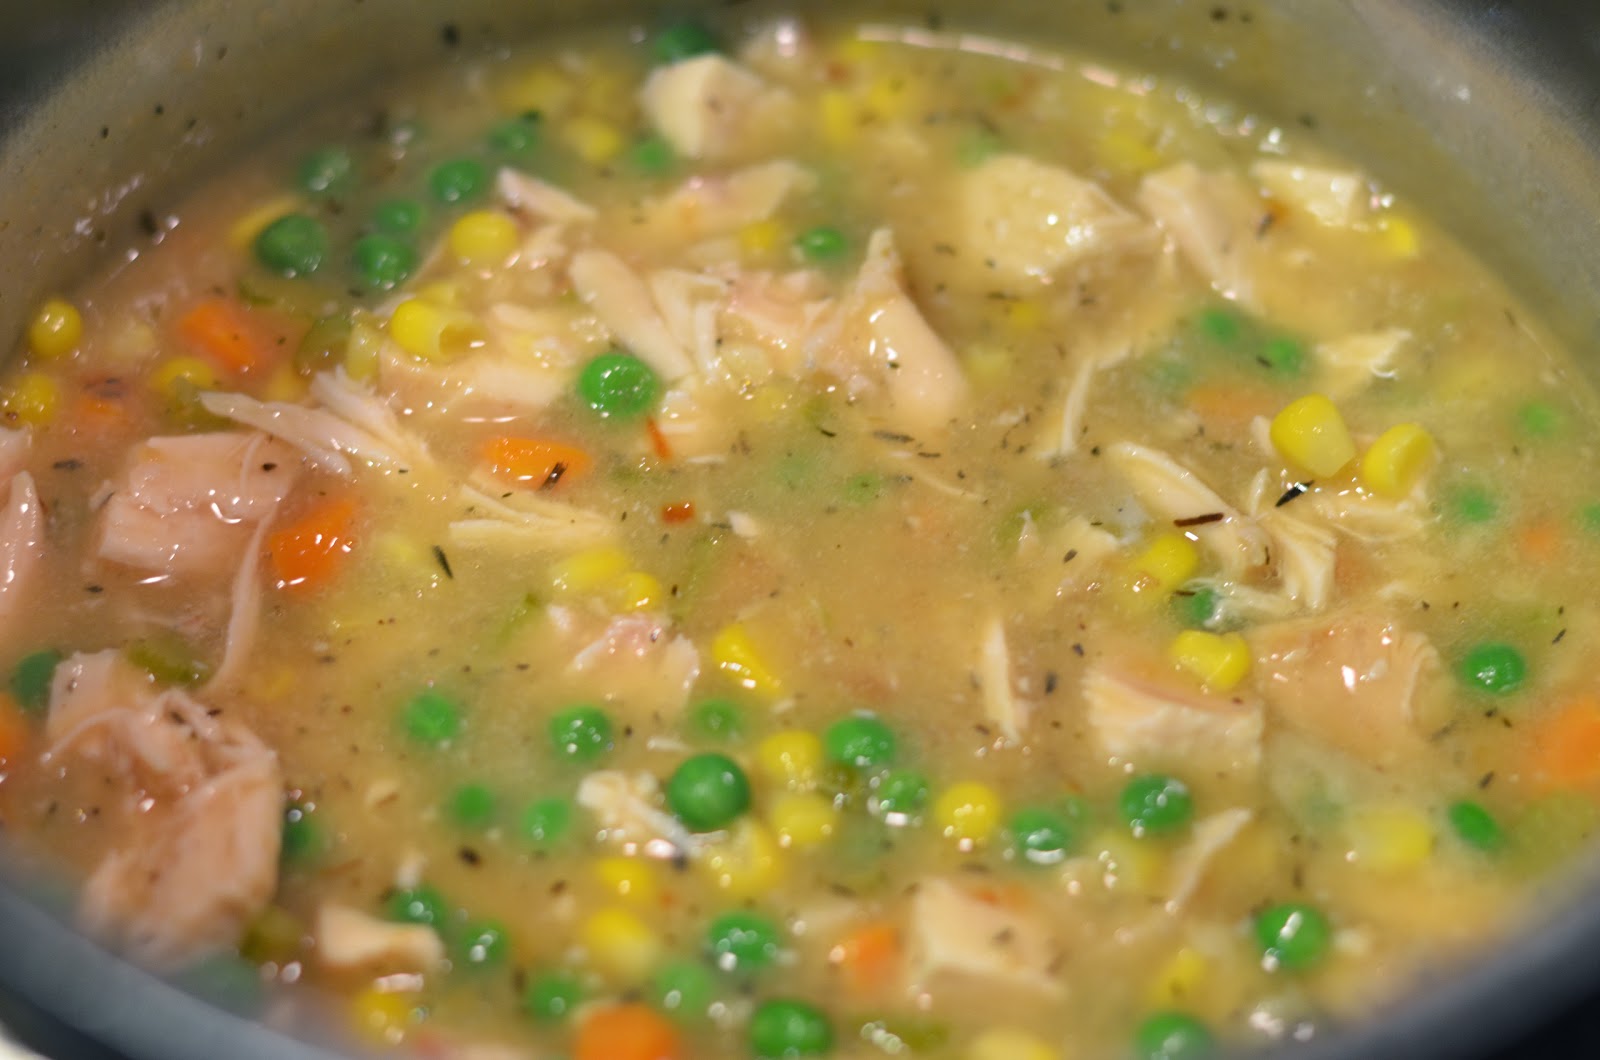
This Chicken Pot Pie was yummy and comforting!  Now, I'm not an expert on Chicken Pot Pie, since I've only had it a couple of times, but this was pretty simple and really fun to make!  I was recently watching Food Network, and Melissa D'Arabian made Chicken Pot Pie Turnovers, and ever since then, my mind has been on making it.  Then I ate Turkey Pot Pie at a restaurant, and it was delicious, so I began recipe searching!  I ended up using Melissa D'Arabian's recipe for Chicken Pot Pie Turnovers, but I tweaked it to my liking.  The modifications I made were:  I used   1 1/4- 1 1/2 cup chicken stock instead of 1 cup stock, 1/2 cup white wine.  I only used 1/2 teaspoon Dijon instead of 1 tsp.  I used a heaping 1/4 cup of frozen peas, and a heaping 1/4 cup of frozen corn instead of just peas.  I also forgot the egg-wash, but it turned out just fine!  I made it into a pie, instead of turnovers. I love the fact that you can customize this recipe to your taste! This would be a perfect meal for one of those days where you just want to snuggle up on the couch and read a book. :)  If you are vegetarian, you could make Chicken-less Pot Pie.  Just don't use chicken, and substitute vegetable stock for the chicken stock!  This was delicious comfort food!
Chop onion, carrot, and celery.
Melt butter and add vegetables.

Add garlic and thyme and cook.  Add flour.

Deglaze with stock.  Add Dijon, chicken, peas, and other frozen veggies.  It's starting to look good!

Before cooked!

Done!  (This is the day after.)


Here is the recipe:

Makes about 4 servings
1 8x8 baking dish  (You can also make this in a pie dish, or individual ramekins)
Total time:  1- 1 1/2 hours

Ingredients:
2 tablespoons butter
1/2 onion, chopped (I chopped my onion very small, because I don't like biting into a chunk of onion)
1 carrot, chopped
1 stalk celery, chopped
Kosher salt and freshly ground black pepper
2 cloves garlic, minced
1/2- 1 teaspoon dried thyme
1 tablespoon flour 
1 1/2 cups chicken stock (or 1 cup stock, and 1/2 cup white wine)
1/2- 1 teaspoon Dijon mustard
1/2 cup frozen peas (I added corn, but you can add really any frozen veggie)
1 1/2 cups cubed or shredded cooked chicken
1 sheet frozen puff pastry, thawed, and unfolded
1 egg

Directions:
Preheat the oven to 375 degrees F.
Melt the butter in a medium saucepan over medium heat. Cook the onions, carrots, and celery with salt and pepper, to taste, until the carrots soften, about 10 minutes. Add the garlic and thyme and cook for an additional minute, stirring frequently. Add the flour and cook about 1 minute more. Turn up the heat to medium-high and deglaze the pan with the stock.  Add the Dijon mustard. Add the peas and chicken and cook on a very low simmer until the sauce thickens up into a gravy, 5 to 10 minutes. Remove from the heat and set aside.

Pour the filling into dish.  Place the puff pastry on top, and cut it to size.  Whisk the egg with a splash of water and brush the pie with the egg wash. Cut a small slit in the top to allow the steam to escape during baking. Bake the pie until golden brown, about 30 minutes.  Let cool and set, at least 10 minutes before serving as the filling will be very hot.

Tuesday, October 29, 2013

Buttermilk Brownies


Buttermilk Brownies                
Today I made one of my favorite desserts. EVER.   My family recipe for Nana’s Buttermilk Brownies.  It was my great-grandmother’s recipe.  Since I have a gluten-free person in my family, I always make these using ‘Bob’s Red Mill’ All-purpose gluten-free flour.  It tastes the same!  This is a Thanksgiving favorite in our family, or really any occasion!  The creamy frosting on top of moist brownies… Mm mmm! :)  And if you don’t have buttermilk in your fridge, you can use this simple substitute; for ½ cup buttermilk, 1 ½ tsp. white vinegar, and ½ cup milk.  Stir the milk and vinegar.  And Voila!  Buttermilk!  These are some of the best brownies I've had!

'Hot Cocoa Mixture' when it's done...

This is the batter before you add the chocolate mixture.

The batter, completed.  Look at that chocolately goodness!  

Before it's in the oven!

Sifted powdered sugar... It looks like snow!

Delicious frosting,  mm mmm!

They're done!  Look at that perfection! :)


Here are the recipes:                                                                                Nana’s Buttermilk Brownies
Makes:  1 9x13 pan.  Oven Temp:  400*. Baking time:  About 20-30 mins.  (Depends how thick)

  •     1 cup butter
  •   1 cup water   
  •   1/3 cup cocoa 
  •      2 cups all-purpose flour
  •   2 cups granulated sugar
  •   1 teaspoon baking SODA
  •   ½ teaspoon salt
  •    ½ cup buttermilk
  •    2 slightly beaten eggs
  •    1-1/2 teaspoons vanilla extract
  •    1 recipe Chocolate Buttermilk Frosting 


Preheat oven to 400 degrees.  Grease and flour (I just spray with non-stick spray) a 9x13 pan or 2 8x8s.  In small saucepan, combine butter, water and cocoa.  Cook and stir over medium heat until mixture comes to a boil.  Remove from heat and set aside.  In a large bowl stir together flour, sugar, baking soda and salt.  Add buttermilk, eggs and vanilla.  Beat until smooth.  Stir hot cocoa mixture into batter.  Beat by hand until well combined.  Pour into prepared pan and bake for 20-30 minutes.  While brownies are warm, pour chocolate buttermilk frosting on top and spread VERY gently.

Nana’s Chocolate Buttermilk Frosting (My favorite frosting!)


  •    4 tablespoons butter
  •     ¼ cup cocoa
  •     ¼ cup buttermilk  (just half the substitute recipe)
  •   1 teaspoon vanilla
  •     1 ¾- 2 ¼ cup sifted powdered sugar* 

In medium saucepan, combine butter, cocoa and buttermilk.  Bring to boil (mixture may appear curdled).  Remove from heat.  Stir in vanilla and then beat in powdered sugar.  Immediately pour over warm brownies and spread frosting gently to edges of the pan.  Cut into squares when cool. 


I swear I could just eat this frosting by the spoonful!  It’s amazing!   This is definitely my favorite brownie recipe, and although it takes longer than a box mix, it’s worth it!

 *Sifting the powdered sugar will really help the frosting to have no clumps.  It is an extra step, so if you don’t really care if you have a couple clumps of powdered sugar in your frosting, then don’t worry about it.


Sunday, October 27, 2013

Welcome to my blog!

Welcome to 'This liitle life of mine'!  My name is Payson, I'm 12 years old, and I'm homeschooled.  I love to cook, so there will be lots of my favorite recipes posted! :)  I wanted to create a blog to share my small piece of the world with people everywhere.  If I can inspire, help, or make one person's day better, then this will be an accomplishment!  Check back soon for my next post!